How can we help?
This knowledge base was built using the Echo knowledge base plugin
-
Getting Started
-
Widgets
-
Knowledge Base Widgets
You are here:
Views313
byDennis
Print
Advanced Heading
3.4 out Of 5 Stars
15 ratings
| 5 Stars | 53% | |
| 4 Stars | 7% | |
| 3 Stars | 0% | |
| 2 Stars | 7% | |
| 1 Stars | 33% |
Overview
Copy the URL link to this section to share
Create professional headings with features such as badge and link.
Presets
Copy the URL link to this section to share
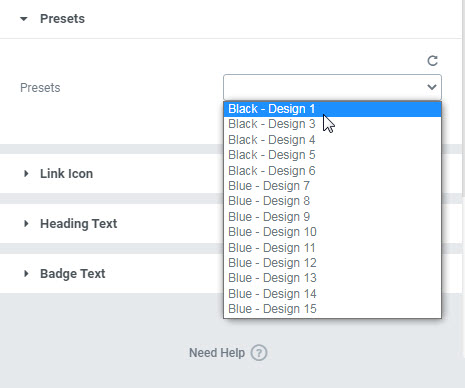
Our Advanced Heading has 15 presets to choose from.
Examples
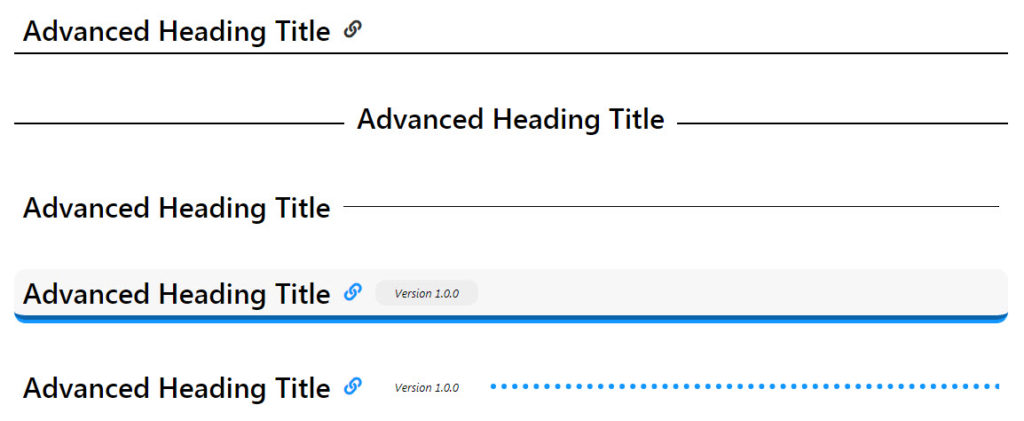
See More Examples
Click here to see all presets for Advanced Heading
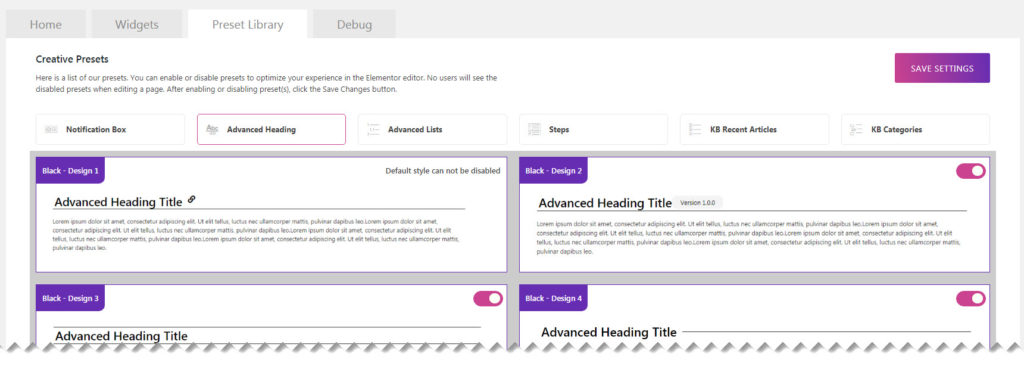
Preset Library
Copy the URL link to this section to share
Each of our widgets has presets. A preset is a predefined configuration that applies certain styles so that you don’t need to spend time configuring one. You can further customize each preset.
We currently have 15 preset styles to choose from to get you started quickly.
To learn more about the Presets and how to use them, click here.
How to Use the Widget
Copy the URL link to this section to share
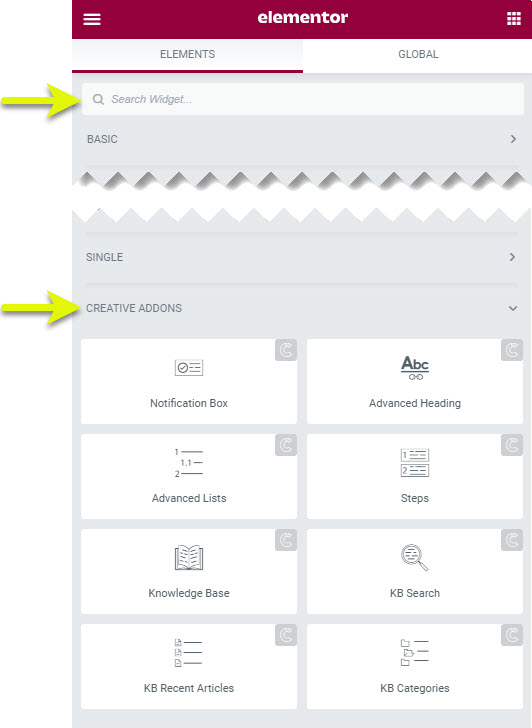
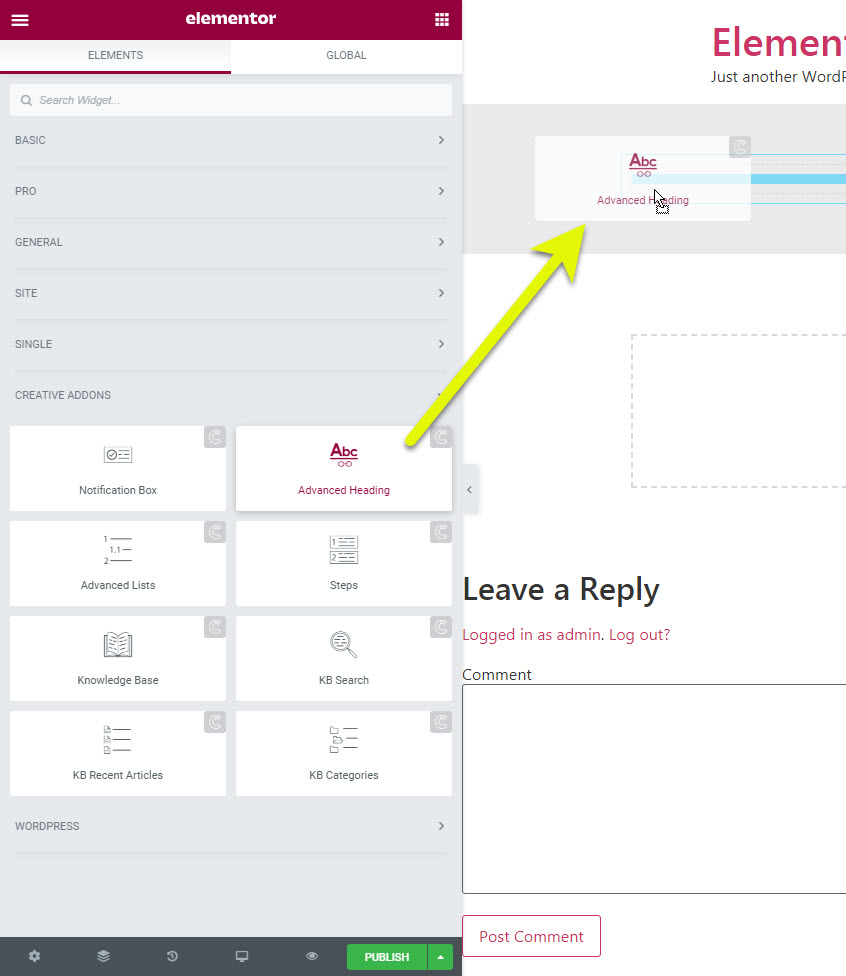
1 Find The Widget
Copy link to this section: Find The Widget
2 Drag and Drop
Copy link to this section: Drag and Drop
Click and drag the widget into a place on your web page.
3 Choose your Initial Preset
Copy link to this section: Choose your Initial Preset
Choose a Preset to apply predefined styles.
4 Setting Overview
Copy link to this section: Setting Overview
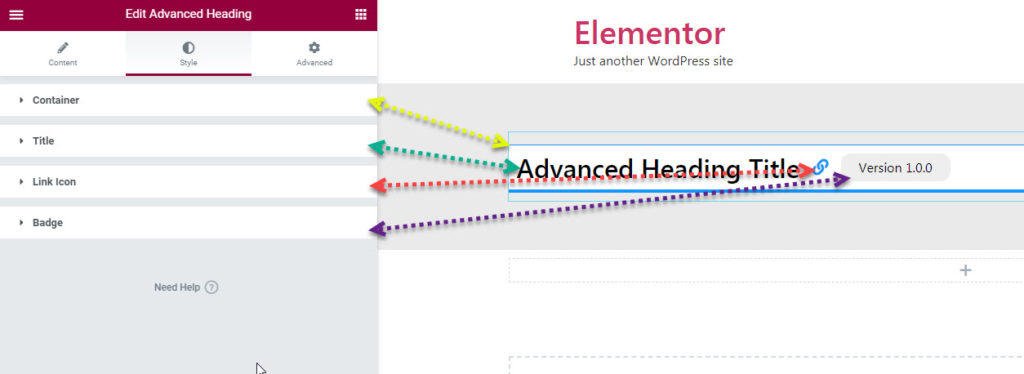
The Advanced heading has four main areas that you can control
- Container - controls the overall wrapper of the widget
- Title - controls the title font / colors etc..
- Anchor Link - the anchor link provides a URL link when the user clicks on the icon. This Copied URL you can share with others and it will take them directly to that location.
- Badge - additional information for the heading.
Was this article helpful?
3.4 out Of 5 Stars
15 ratings
| 5 Stars | 53% | |
| 4 Stars | 7% | |
| 3 Stars | 0% | |
| 2 Stars | 7% | |
| 1 Stars | 33% |
5

